
If you use your basement as a workout studio, office, store, or man cave, waterproofing it from the outside can be a less intrusive approach to keep water from entering your spaces. Waterproofing basement walls from the outside stops water from entering your basement, which differs from the concept of interior basement waterproofing.
Smouse Brothers provides professional exterior basement waterproofing solutions in the Ozarks. Our services are designed to protect your home and valuables from water infiltration, mold growth, and foundation damage.
What is Exterior Basement Waterproofing?
Exterior basement waterproofing is the process of removing soil and debris from home foundations and applying a new external barrier to prevent water infiltration. Traditionally, this was achieved by spreading a thin layer of mortar on the foundation wall, but today, durable rubberized coatings are applied as paint-like solutions.
While interior waterproofing focuses on managing water that has already infiltrated the basement, exterior waterproofing aims to prevent water from ever reaching the basement's interior. Here are some of the benefits of exterior basement waterproofing:
- Reduces the moisture in the basement: Exterior basement waterproofing prevents water from infiltrating the foundation walls, keeping your basement dry and free from mold, mildew, and musty odors. A dry basement is essential for maintaining a healthy indoor environment and preventing damage to stored belongings.
- Improves structural soundness of foundation walls: Water can be destructive when it seeps into foundation walls. Over time, moisture penetration can weaken the structural integrity of these walls, leading to cracks and potential foundation settlement. Exterior waterproofing protects the foundation by creating a solid barrier against water intrusion, which helps preserve the structural soundness of the foundation and prolongs its lifespan.
- Increases property value: Potential buyers are often attracted to homes with a dry, well-protected basement. A waterproofed basement adds to the overall appeal of your home, making it more marketable and potentially fetching a higher sale price when the time comes to sell.
- Gives you peace of mind: One of the most valuable benefits of exterior basement waterproofing is the peace of mind it offers homeowners. Knowing that your basement is protected from moisture-related issues can relieve the stress and worry that often surrounds water damage concerns.
What Does Exterior Basement Waterproofing Entail?
If you're wondering what exterior basement waterproofing entails, here is a step-by-step guide:
Step 1: Excavation around the building
Exterior waterproofing requires excavation around the perimeter of the building. Typically, these excavations are between 4 and 8 feet in depth and about 2 ½ feet in width. The size of the excavation depends on the elevation of your property.
Step 2: Installation of speed shoring
Next, speed shoring is installed to guarantee the safety of the workers and prevent soil from refilling at the excavation site.
Step 3: Removal of worn weeping tiles
The excavation is done until the foundation footing is exposed, at which point the old weeping tile can be removed. A new 4-inch weeping tile, equipped with a filter cloth, is installed.
Step 4: Inspection, cleaning, and repairing the foundation walls
The next step involves cleaning and inspecting foundation walls to identify any gaps or structural fissures. Any damaged sections are carefully removed and restored using a non-shrink, specialized cement that expands upon application to fill the gaps. We address any cracks or blemishes such as honeycomb or defects with the wall using a combination of epoxy and other sealers.
Step 5: Installation of mesh
After those blemishes have been fixed, we use a rubber membrane we attach to the walls. The membrane has bentonite on it which helps it adhere to the wall but allows it to move so it doesn't tear if there's foundation movement.
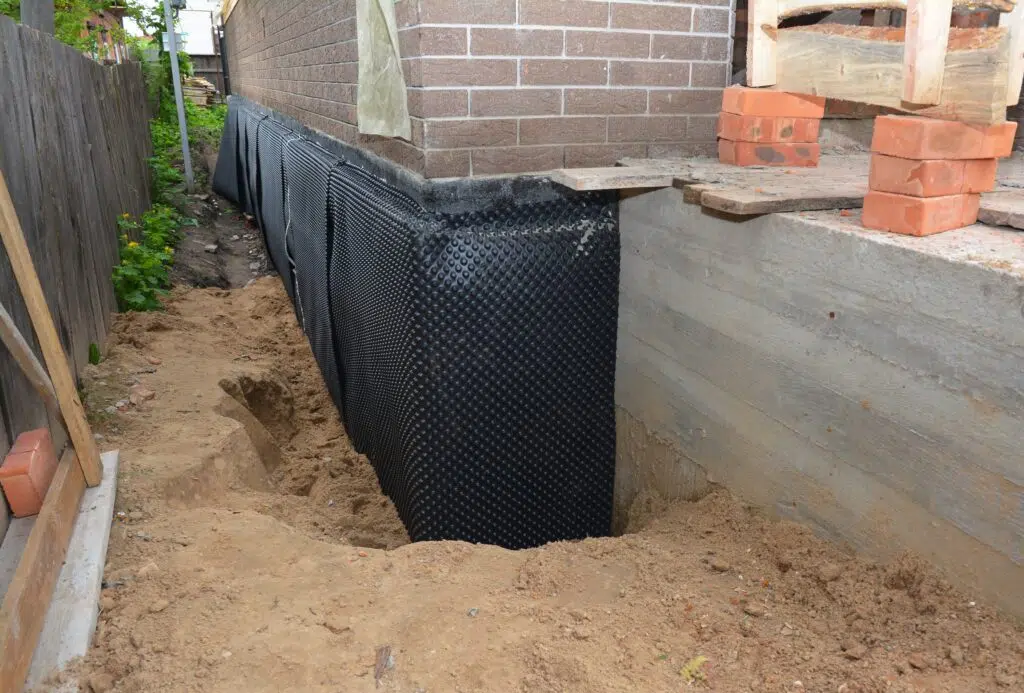
Step 6: Fastening of soil side drainage sheet
Next, the soil-side drainage sheet is fasted to the top of the termination bar. The drainage sheet acts as a protection board and drainage membrane, offering greater sturdiness compared to the residential-grade dimple board.
Step 7: Installation of window wells
If your home has windows below ground level, you may need to install a window well. A 4-inch weeping tile should be placed vertically from the window's interior well to the foundation footings. To avoid blockages, ensure that the weeping tile and the pipe do not come into contact with each other.
Step 8: Placement of clear gravel
A layer of ¾ inch clear gravel is then placed over the weeping tile to enhance the level of drainage. The gravel layer is blended with soil to hinder excessive water absorption through the weeping tile, as this could result in reduced drainage or blockages.
Step 9: Refilling the site with native soil
The last step involves refilling the area with native soil before compacting it to the original level. After the soil has been reinstated to its initial position, your foundation will be completely waterproofed, ensuring no more water-related problems for your basement, whether from the exterior or interior.
Get Pro Exterior Waterproofing in Springfield, MO
When it comes to protecting your home from the elements and ensuring its resilience, exterior waterproofing is an investment that pays off. At Smouse Bros, we pride ourselves on being the leading provider of trusted exterior waterproofing solutions in SW Missouri & NW Arkansas. Our experienced professionals are dedicated to delivering top-of-the-line services using the latest technology and proven methods to safeguard your home against moisture, leaks, and structural damage. Contact us today to schedule a free consultation.
Featured Image: Radovan1 / Shutterstock

